Creating a volcano for a science fair project is a classic and engaging way to combine creativity with scientific principles. I can assure you it’s a journey filled with learning and fun.
The process of constructing a model volcano offers a hands-on experience in understanding geological and chemical concepts, and the excitement of the eruption is always a crowd-pleaser.
In this guide, I’ll walk you through the steps of making an impressive, yet manageable, model. Whether you’re a student looking for a striking project, a parent assisting your child, or a teacher guiding your class, this guide is designed to provide you with all the necessary information and tips to make your project a success.
What You Will Need
To make a volcano model, you will need the following materials:
- A cardboard box or a large tray
- A plastic bottle or a small jar
- Newspaper or paper towels
- Tape or glue
- Scissors
- Paint or markers
- Water
- Flour
- Salt
- Cooking oil
- Baking soda
- Vinegar
- Food coloring (optional)
- Dish soap (optional)
How to Make the Volcano Model
To make the model, follow these steps:
- Cut off the top of the plastic bottle or jar, and place it upside down on the cardboard box or tray. This will be the mouth of your volcano.
- Crumple up some newspaper or paper towels, and tape or glue them around the bottle or jar to form the shape of your volcano. You can make it as big or as small as you want, but make sure it is stable and sturdy.
- Mix some water, flour, salt, and cooking oil in a bowl to make a thick paste. This will be the papier-mâché for your volcano.
- Cover the newspaper or paper towels with the papier-mâché, and smooth it out with your fingers. Leave a hole at the top of the bottle or jar for the eruption.
- Let the papier-mâché dry completely, preferably overnight.
- Paint or color your volcano with your desired colors. You can use brown, gray, or black for the base, and red, orange, or yellow for the lava. You can also add some details like rocks, trees, or animals to make your volcano more realistic.
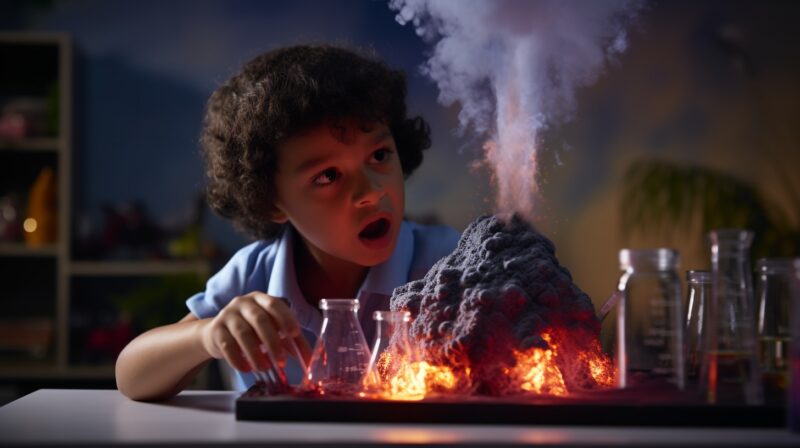
- Your volcano model is now ready for the eruption!
How to Make the Volcano Erupt
- Fill the bottle or jar about halfway with water.
- Add some food coloring to the water if you want to make the lava more colorful.
- Add some dish soap to the water if you want to make the lava more bubbly.
- Add about two tablespoons of baking soda to the water, and stir well.
- Pour some vinegar into a separate cup or container.
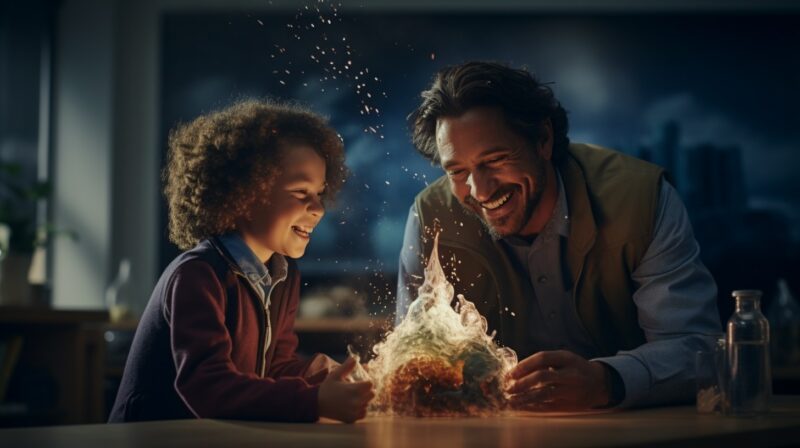
- When you are ready to erupt your volcano, quickly pour the vinegar into the bottle or jar, and watch the reaction!
You can repeat the eruption as many times as you want, by adding more baking soda and vinegar.
How to Explain the Science Behind the Experiment
To explain the science behind the experiment, you need to understand a few concepts.
Volcanoes are openings in the Earth’s crust where magma (molten rock) and gas escape from the mantle (the layer below the crust). There are different types of volcanoes, such as shield volcanoes, composite volcanoes, and cinder cones, depending on the shape, size, and composition of the magma and the eruption.
For young scientists eager to explore more about these fascinating geological formations, a variety of educational resources can be found online, including channels that bring the wonders of earth science to life.
Eruptions occur when the pressure inside the volcano becomes too high, and the magma and gas force their way out of the vent (the opening at the top of the volcano). The type and intensity of the eruption depend on the viscosity (thickness) and gas content of the magma. The more viscous and gas-rich the magma is, the more explosive the eruption is.
Baking soda and vinegar react to produce carbon dioxide gas, water, and sodium acetate (a salt). The carbon dioxide gas forms bubbles that rise to the surface, creating foam and pressure. The foam and pressure push the liquid out of the bottle or jar, simulating a volcanic eruption.
Food coloring and dish soap are optional ingredients that enhance the appearance of the eruption. Food coloring adds color to the liquid, making it look more like lava. Dish soap makes the liquid more bubbly, making it look more like volcanic ash.

How to Present Your Project to the Judges
To present your project to the judges, you need to do the following:
- Step 1: Prepare a display board that summarizes your project. Include the title, the question, the hypothesis, the materials, the procedure, the results, the conclusion, and the references. Use clear and concise language, and include pictures, graphs, or charts if possible.
- Step 2: Prepare a demonstration that shows how your model works. Explain the steps you followed and the science behind the experiment. Erupt your volcano, and describe what you observe. Be prepared to answer questions from the judges or the audience.
- Step 3: Prepare a report that details your project. Include the same information as the display board, but in more depth and detail. Use proper grammar, spelling, and punctuation, and cite your sources correctly.
FAQs
Can I use alternative materials for the volcano structure instead of newspaper or paper towels?
Yes, you can use a variety of materials to create the structure of your volcano. Materials like clay, playdough, or even a sand and glue mixture can be effective. The key is to ensure that the material is moldable and can hold the shape of a volcano.
Is there a way to make the eruption last longer?
To prolong the eruption, you can adjust the ratio of baking soda to vinegar. Using more baking soda and slowly adding vinegar in increments can extend the duration of the eruption. Additionally, using warm vinegar can increase the reaction time.
Can I create different colored lava for my volcano?
Absolutely! You can use different food colorings to mimic various types of volcanic lava. For instance, using red and yellow can create a more realistic lava effect, while blue or green can make it look more artistic and unusual.
How can I make the eruption more explosive?
To create a more explosive eruption, you can increase the amount of dish soap in the mixture. This creates more bubbles and foam, leading to a more vigorous eruption. Be cautious, as this can also be messier.
What are some safety precautions I should take while making and erupting the volcano?
Always work in a well-ventilated area and wear protective eyewear to avoid irritation from the vinegar fumes. Also, conduct the eruption in an area where spills can be easily cleaned, and be mindful of the potential mess from an explosive eruption.
Can this volcano model be reused for multiple eruptions?
Yes, all you have to do is clean out the bottle or jar after each eruption and refill it with the necessary ingredients for the next eruption. However, the papier-mâché structure may weaken over time, especially if it gets wet or is not allowed to dry properly between eruptions.
Summary
The main purpose and goal of this project was to demonstrate how volcanoes work, and how different factors affect their eruptions. By doing this, you’ll learn some basic science concepts and terms related to volcanoes, such as magma, gas, viscosity, baking soda, vinegar, carbon dioxide, etc. but most importantly – you’ll have a lot of fun!
I hope you enjoyed this blog post, and that you are inspired to try this project yourself or to learn more about volcanoes. You can also ask your teacher or a scientist for more guidance and advice. Have fun with your experiment, and good luck with your presentation!